WindowsからApp Store Connectにipaファイルをアップロードする
ipaファイルをApp Store Connectへアップロードする場合、Xcode上でAcrhive後にそのままアップロードする方法と、macOSアプリとして配布されているTransporter というアップローダーツールを使う方法があります。

このTransporterについて詳しく調べていたら、どうやらjavaベースのCLIツールもあってしかもLinuxとWindows向けも用意されていることが判明しました。
What is Transporter?
Transporter is Apple’s Java-based command-line tool for large catalog deliveries. You can use Transporter to deliver your pre-generated content, in a Store Package, to the iTunes Store, Apple Books, and App Store.
...
(中略)
Transporter includes the following features:An easy-to-use, out-of-the-box installation package, including installers for macOS, Microsoft’s Windows, and Red Hat Enterprise Linux.
...
iTunes StoreやApple Booksとあるのでメディア・コンテンツのアップロードツールっぽいですが、App Storeへのアップロードもサポートしているようです。
iOSアプリの開発にはmacOSは必須ですし、App Store Connectへのアップロードには当然macOSが必要だと思ってたらWindowsでもLinuxでもアップロードできるんですね。
ということで今回はこのTransporterのCLIツールを使ってWindowsでipaファイルをアップロードする方法をまとめてみます。
TransporterをWindows上でインストールする
マニュアルの Install Transporter on Windowsに従ってexeをダウンロードして、実行するとダウンロードコマンド一式が落ちてきます。
'C:\Program Files (x86)\itms というところに iTMSTransporter.cmd があるので、これをPowerShell上で実行すればよさそうです。
PS C:\Users\xxxxxx> & 'C:\Program Files (x86)\itms\iTMSTransporter.cmd' -help
[2020-12-26 13:32:18 JST] <main>  INFO: Configuring logging...
[2020-12-26 13:32:18 JST] <main>  INFO: Logging level set to eXtreme
[2020-12-26 13:32:18 JST] <main>  INFO: Transporter is searching for new software components.
[2020-12-26 13:32:18 JST] <main>  INFO: INFO: using cached repository.xml file.
[2020-12-26 13:32:19 JST] <main>  INFO: Update check complete.
[2020-12-26 13:32:21 JST] <main> DEBUG: Attempting refresh of configuration data from https://contentdelivery.itunes.apple.com/transporter/Defaults.properties
[2020-12-26 13:32:21 JST] <main> DEBUG: Configuration refresh successful.
[2020-12-26 13:32:21 JST] <main> DEBUG: Saving configuration to local path: C:\Users\xxxxxi\.itmstransporter\Defaults.properties
usage: iTMSTransporter [-help <arg> | -info | -m <arg> | -version]   [-o <arg>] [-v
       <arg>]  [-WONoPause <arg>] [-Xmx4096m]
iTMSTransporter : iTunes Store Transporter 2.1.0
 -help <arg>        Show this help.  If a mode value is specified, show help specific
                    to that mode.
 -info              The -info option should be used by itself and returns the
                    copyright notice and acknowledgements.
 -m <arg>           The -m option specifies the tool's mode.  The valid values are:
                    verify, upload, provider, diagnostic, lookupMetadata,
                    createArtist, lookupArtist, status, statusAll,
                    createMetadataTicket, queryTickets, generateSchema, transferTest,
                    downloadMetadataGuides, listReports, requestReport
 -o <arg>           The -o option specifies the directory and filename you want to use
                    to log output information.  By default, Transporter logs output
                    information to standard out. If you specify a filename,
                    Transporter logs the output to the specified file, as well as to
                    standard out.
 -v <arg>           The -v option specifies the level of logging.  The five values
                    are: off, detailed, informational, critical, eXtreme.
 -version           The -version option should be used by itself and returns the
                    version of the tool.
 -WONoPause <arg>   The -WONoPause option is only valid on Windows and its value can
                    be 'true' or 'false'.  If an error occurs during script execution,
                    the process idles because the message 'Press any key...' is
                    displayed on the console and the system awaits a keypress. To
                    avoid this behavior, set this property to true
 -Xmx4096m          Specifies that you want to change the Java Virtual Machine's (JVM)
                    allocated memory by increasing the JVM heap size.  By default,
                    Transporter uses a 2048MB heap size. You can use the -Xmx4096m
                    option to specify a 4-gigabyte (GB) heap size. Apple recommends,
                    if needed, increasing the heap size to 4096MB by specifying the
                    -Xmx4096m (or -Xmx4g) option and adjusting as needed.
[2020-12-26 13:32:21 JST] <main> DBG-X: Returning 0
今回はApp Store Connectへのアップロードなのでmodeとしてはuploadを使えばよさそうです。
-u、-pオプションでApp Store Connectへのクレデンシャル情報を設定するようです。
アップロードするipaファイルパスの指定は -assetFile オプションを使うようで、さらにLinuxやWindowsの場合は-assetDescriptionオプションをつけろと書いてあります。
App uploads for macOS, Linux, and Windows: Specifies the directory and filename for the app source file (.pkg or .ipa). For Linux and Windows, -assetDescription is required.
なんじゃこのファイルと思ったらArchiveをExportするときに生成するファイルのようで、ExportOption.plistファイルに指定しておけばよさそうです。
https://help.apple.com/xcode/mac/current/#/deva1f2ab5a2
ipaファイルを作成する
適当なサンプルアプリをmacOS上で作ってipaファイルを配布用の証明書で署名し、Exportします。
ExportOption.plistファイルに以下のようにgenerateAppStoreInformationをセットするとAppStoreInfo.plistというファイルが生成されました。
<dict>
        ...
    <key>generateAppStoreInformation</key>
    <true/>
</dict>
設定の詳細はこちら。
生成したipaファイルとAppStoreInfo.plistファイルをWindowsに持っていきます。
Windows上でTransporterのコマンドを実行してみる
いよいよWindows上でTransporterコマンドを実行してみます。
PS C:\Users\xxxxxx> & 'C:\Program Files (x86)\itms\iTMSTransporter.cmd' -m upload -assetFile .\Desktop\sample.ipa -u xxxxx
  -p xxxxxx -assetDescription .\Desktop\AppStoreInfo.plist -v eXtreme
実行してみると、アップロード処理に失敗して以下のようなエラーが発生しました。
[2020-12-26 13:46:24 JST] <main> ERROR: Sign in with the app-specific password you generated. If you forgot the app-specific password or need to create a new one, go to appleid.apple.com (-22938)
どうやらここで指定するパスワードはApple IDのパスワードではなくてapp-specific passwordというのを指定するようです。
Transporterのドキュメントにも書いてありました。二段階認証を設定しているアカウント向けのアクセストークン相当のもののようです。
Two-factor authentication
If you have enabled two-factor authentication on your account, you must create an app-specific password, as described in Using app-specific passwords. Using an app-specific password increases the level of security and ensures your Apple ID password won’t be collected or stored by third-party apps.
発行方法はこちらに書いてありました。
Apple IDの設定画面でapp-specific passwordを生成し、設定して再度実行すると無事アップロードが成功しました。
PS C:\Users\xxxxxx> & 'C:\Program Files (x86)\itms\iTMSTransporter.cmd' -m upload -assetFile .\Desktop\sample.ipa -u xxxxx
  -p xxxxxx -assetDescription .\Desktop\AppStoreInfo.plist -v eXtreme
今回は試しませんが、おそらく似たようなやり方でLinuxからもアップロードできるでしょう。
まとめ
WindowsでもTransporterのコマンドラインツールを使えばApp Store Connectへアップロードできることがわかりました。
政治的にmacOSが使えなかったり購入できなくて「どうしてもWindowsでできないのか」と聞かれた時にはぜひこのやり方を紹介するとよいでしょう。
FlutterにおけるPluginとの付き合い方 #flutter
本記事は Flutter #1 Advent Calendar 2020 の12/13の記事です。
Flutterでアプリ開発を行う時、 pub.dev で公開されているプラグインを使うことで特定の実装やネイティブ実装を代用することができます。
このときそのまま公開されているプラグインを使うか、自作でMethodChannelとネイティブコードで実装するか選択することができます。本記事では私が普段どのような考え方で判断しているかを一例として紹介したいと思います。
なお今回はWebやDesktopは含めず、iOS・Androidアプリに絞った話になります。
Flutterにおけるプラグイン
Flutterにおいてプラグインを利用する場合、pubspec.yamlに利用したいパッケージ名を記入した状態でflutter pub getを実行することで利用することができます。
プラグインを使うメリットとデメリット
Flutterにおけるプラグインを使うメリットとデメリットを上げてみると以下のものが考えられます。
- メリット
- デメリット
まずメリットですが、そもそもFlutterという技術選択をした理由に開発の高速化が念頭にあることが多いと思うので、プラグインを利用することでさらなる高速化が望めます。 またWebViewやカメラなどのOSのネイティブ機能を使った機能を実装する場合は本来であればiOS・Androidの知識が十分に必要になりますが、プラグインを利用することでFlutterの知識があれば機能を実装することができます。
一方でデメリットでいうと、プラグインが提供するインターフェースが必ずしも自分が使いたい形式になっていなかったり、必要な機能を実装していないケースがあります。また複数のプラグインを組み合わせて使う場合、バージョンやライブラリの競合が起きるケースもあるでしょう。 OSSとして個人が公開しているものにはバグが含まれている可能性もあります。また利用し始めた当初は問題なかったけど、時間がたってからメンテナンスが放置されてFlutterのバージョンアップ時にエラーになる、なんてケースも考えられます。
これらのメリデメを踏まえてプラグインを使うべきか自力で実装すべきかをどのように考えていけばよいかを考察します。
プラグインを利用するか、自力で実装するか
まずプラグインを利用するか自力で実装するかについては答えはなく、プロジェクトの状況に合わせて最適な選択をするのがよいです。
iOS・Androidそれぞれ個別の実装している余裕がなかったり、そもそもネイティブ実装ができるメンバーがチームいない場合は結果的にプラグインを積極的に利用することになると思います。
一方で公開されているプラグインが提供する機能では不十分だったり、そのアプリが提供するコア機能となる部分として自由なカスタマイズをしたいケースであればプラグインを利用せずに自力で実装することになると思います。
FlutterではMethodChannelを使うことでネイティブで実装した機能を画面、部分的な画面、関数単位で実行することができます。
プラグインの選定基準
次にプラグインの選定を見ていきます。
ネイティブの機能を利用するプラグインはある程度は公式が用意してくれているので、まずはそれを使って期待する使い方ができるかどうかを確認してみましょう。
Firebaseを利用する場合も公式が利用を推奨しているプラグインから選ぶとよいでしょう。
3rd partyが公開しているSDKをラップしたプラグインを利用する場合もまずは公式が出しているものを見てみるとよいです。
その他のプラグインを利用したい場合は以下の観点で選ぶとよいでしょう。
- 評価が高く、利用実績が豊富であること
- ドキュメントが充実していること
- ライセンスの自由度が高いこと
- 更新が活発であること
利用を検討しているプラグインについては、ネイティブの知識がある程度必要になりますが、なるべく中身のソースコードも読むようにしましょう。ソースコードを読んでみて、これなら自分でも実装できそうだ、と判断したら自力での実装で切り替えるのもありだと思います。
プラグインへの依存と付き合っていく
自身のプロダクトにプラグインを利用するという選択をした場合、そのプラグインの依存関係を常に念頭にして追加開発・運用していく必要があります。
Flutterのバージョンアップや新OSが出たときに利用しているプラグインがきちんと対応できるのか、仮に対応できない場合はパッチを当てるのか、別のプラグインを検討するのか、利用をやめて自力で実装し直すのかなどを定期的に見直すようにしておくとよいです。
FlutterはそもそもそれだけでiOSとAndroidを横断したフレームワークであるため、プラグインも含めるとかなり複雑な構成をとることとなります。そのため依存関係を正しく把握していないとあっという間に負債化してしまう可能性があるので注意が必要です。これについては以前ブログにまとめたのでそちらも見てみてください。
最近でいうと、長らくWebViewのプラグインとしてflutter communityのものがよく利用されてきましたが、ようやく公式のWebView Pluginが正式公開されましたね。
flutter communityの方のプラグインはもうメンテされないようなので新しい方に移行していく必要があります。
プロジェクトの状況にもよりますが、私が以前いたプロジェクトでは初期リリースはプラグインを積極的に活用して開発効率を重視し、追加開発フェーズである程度落ち着いてきたら pubspec.yamlを定期的に見直して少しずつ自力実装に移行していく、という戦略を取っていました。
まとめ
プラグインの利用によってその機能の実装を省略できる一方で、プラグイン自体のメンテナンスが放置されていて本体のバージョンアップの足かせになり開発スピードが落ちてしまった、という経験をWordPressやJenkinsなどで経験したことがある人もいるのではないでしょうか。
Flutterにおいてもそのようなことにならないように、プラグインの利用を検討するときはどのような観点で自力実装と使い分けているかをプロジェクト全体の方針として明確にし、利用しているプラグインを定期的に見直すようにしておくとよいでしょう。
App Store Connectアップロード時のipaファイルのvalidateをcliで実行する #iOS #flutter
本記事は主にFlutterの話題ですが、iOS向けの内容でFlutterを使っていなくても参考になると考えたため iOS #2 Advent Calendar 2020 として投稿しようと思います。
App Store Connetへのアップロード時のipaファイルのValidate
XcodeでApp Storeの配布資材を作成した後、Xcode上ではApp Store ConnectにアップロードするDistribute Appボタンの下にValidate Appというボタンがあります。
これを押すと配布しようとしているipaファイルがApp Store Connectへのアップロード要件を見たしているバイナリかどうかを簡易的にチェックすることができます。
https://help.apple.com/xcode/mac/current/#/dev37441e273
今回はこれを自動化するにあたって試行錯誤したことをまとめます。

Flutter 1.22.0にアップデートしたアプリがApp Store Connectにアップロードできない
運用していたFlutterアプリのFluterのバージョンを1.22.0にバージョンアップを実施し、いつも通りにCDパイプラインでipaファイルを作成した後にApp Store Connectにアップロードしようとしたら以下のエラーが発生しました。

ipaのExportには成功します。ipaファイルをTransporter経由でアップロードしても同様のエラーが発生しました。

おかしいなと思ってググってみるとどうやらFlutterのバージョンアップに起因するもののようです。
ios/Flutter/AppframeworkInfo.plist の MinimumOSVersion を 9.0 にすることで解消するようです。
Validate Appを自動化する
以前紹介したFlutterのCDパイプラインではipaの作成にとどまっており、今回のエラーはApp Store Connectにアップロードするまで気づくことができませんでした。
そこで今回はXcode上で実行可能なValidate AppをCDパイプラインに組み込んで同様のエラーが発生しないように改善します。
Validate AppをCLIで実行するには、xcodebuildコマンドのexportArchive時に指定しているexportOptionPlistファイルのdestinationをuploadに、methodとしてvalidationとして以下のように指定すればよいようです。
// ExportOptionsProdValidate.plist
<?xml version="1.0" encoding="UTF-8"?>
<!DOCTYPE plist PUBLIC "-//Apple//DTD PLIST 1.0//EN" "http://www.apple.com/DTDs/PropertyList-1.0.dtd">
<plist version="1.0">
<dict>
    <key>destination</key>
    <string>upload</string> // destinationはupload
    <key>method</key>
    <string>validation</string> // methodはvalidationにする
    <key>provisioningProfiles</key>
    <dict>
        <key>com.takamiii.xcodevalidate</key>
        <string>xcodebuildvalidate-prod</string>
    </dict>
    <key>signingCertificate</key>
    <string>xxxxxx</string>
    <key>signingStyle</key>
    <string>manual</string>
    <key>stripSwiftSymbols</key>
    <true/>
    <key>teamID</key>
    <string>xxxxxx</string>
    <key>uploadBitcode</key>
    <true/>
    <key>uploadSymbols</key>
    <true/>
</dict>
</plist>
exportOptionPlistの説明はこちらがよくまとまっていました。
flutterの場合は flutter build ios --release コマンドの後に実行すればValidate AppをCLIで実行することができそうです。validate appを実行するコマンド例は以下のようになります。
$ xcodebuild -exportArchive -archivePath ../build/Runner.xcarchive \
       -exportOptionsPlist ExportOptionsProdValidate.plist
exportOptionのplistファイルに upload とあるため、実際にアップロードされてしまうのではないかと少し不安に思いましたが、コマンド実行後にApp Store Connectを実際に確認してみたら特にアップロードされた形跡はありませんでした。安心してValidateの処理をパイプラインに組み込めそうです。
なおxcodebuildコマンド内で実行されるApp Store Connectへのアップロードの認証情報はXcodeに設定した認証情報が利用されます。そのため、該当のApp IDに対するApp Store Connectのアップロード権限をもつApple IDの認証情報がないと以下のようなエラーが発生します。
$ xcodebuild -exportArchive -archivePath ../build/Runner.xcarchive \
       -exportOptionsPlist ExportOptionsProdValidate.plist
2020-12-05 19:01:32.639 xcodebuild[43990:6477163] [MT] IDEDistribution: -[IDEDistributionLogging _createLoggingBundleAtPath:]: Created bundle at path '/var/folders/6n/llxh8m296896rymtgjfbkmxw0000gn/T/Runner_2020-12-05_19-01-32.639.xcdistributionlogs'.
error: exportArchive: Failed to log in.

Error Domain=IDEDistributionErrorDomain Code=9 "Failed to log in." UserInfo={IDEDistributionErrorsAccountIssues=(
), NSLocalizedDescription=Failed to log in., NSLocalizedRecoverySuggestion=App Store Connect access for “BLAG9TXR3M” is required. Ensure that your Apple ID account usernames and passwords are correct in the Accounts preference pane.}

** EXPORT FAILED **
またApp Store Connect側にアップロードの受け口となるAppsを作成しておく必要があります。App Store Connect側の設定無しに実行するとアップロードエラーになるため検証時には注意しましょう。
話題はそれますが、xcodebuildコマンドのオプションって把握するの結構大変ですよね...
全然分からない、俺たちは雰囲気でxcodebuildコマンドを使っている
— takamii228 (@takamii228) 2020年12月4日
再現確認
ここからは元の事象の再現確認と修正の手順を順に追ってみます。
まずFlutterのバージョンを1.17.5にした状態でAndroid StudioでFlutterのプロジェクトを作成します。そのあと、Flutterのバージョンを1.22.0に上げます。
次にXcodeでRunner.xcworkspaceを開いてBundle Identiferや証明書関連の情報を設定します。この後の手順の実行にはApp Store Connectへのアップロードに必要なApp IDや配布証明書、プロビジョニングプロファイルが必要手順は省略します。
また上の例で示したexportOptionPlistファイルを作成します。
最後に以下のコマンドを順番に実行してvalidateを実行し、エラーが再現することを確認します。
$ flutter clean
$ flutter pub get
$ flutter build ios --release
$ cd ios
$ xcodebuild -workspace Runner.xcworkspace \
     -scheme Runner \
     -configuration Release archive \
     -archivePath ../build/Runner.xcarchive
$ xcodebuild -exportArchive -archivePath ../build/Runner.xcarchive \
       -exportOptionsPlist ExportOptionsProdValidate.plist
順に実行すると想定通り、冒頭で表示されたのと同じエラー出力がされました。
$  xcodebuild -exportArchive -archivePath ../build/Runner.xcarchive \
       -exportOptionsPlist ExportOptionsProdValidate.plist
2020-12-05 19:20:21.170 xcodebuild[48219:6514151] [MT] IDEDistribution: -[IDEDistributionLogging _createLoggingBundleAtPath:]: Created bundle at path '/var/folders/6n/llxh8m296896rymtgjfbkmxw0000gn/T/Runner_2020-12-05_19-20-21.169.xcdistributionlogs'.
error: exportArchive: App Store Connect Operation Error. Invalid Bundle. The bundle Runner.app/Frameworks/App.framework does not support the minimum OS Version specified in the Info.plist.

Error Domain=ITunesConnectionOperationErrorDomain Code=1091 "error: App Store Connect Operation Error. Invalid Bundle. The bundle Runner.app/Frameworks/App.framework does not support the minimum OS Version specified in the Info.plist." UserInfo={NSLocalizedDescription=error: App Store Connect Operation Error. Invalid Bundle. The bundle Runner.app/Frameworks/App.framework does not support the minimum OS Version specified in the Info.plist.}

** EXPORT FAILED **
Issueの対処通り、ios/Flutter/AppFrameworkInfo.plistのMinimumOSVersionを8.0から9.0に変更します。
...
  <key>MinimumOSVersion</key>
  <string>9.0</string>
...
再度Validateコマンドを実行すると、Validated Runnerとなりエラーは解消されました。
$ xcodebuild -exportArchive -archivePath ../build/Runner.xcarchive \
       -exportOptionsPlist ExportOptionsProdValidate.plist
2020-12-05 19:25:38.546 xcodebuild[49681:6526812] [MT] IDEDistribution: -[IDEDistributionLogging _createLoggingBundleAtPath:]: Created bundle at path '/var/folders/6n/llxh8m296896rymtgjfbkmxw0000gn/T/Runner_2020-12-05_19-25-38.546.xcdistributionlogs'.
Validated Runner
** EXPORT SUCCEEDED **
しかし** EXPORT SUCCEEDED ** というログメッセージは微妙ですね...。
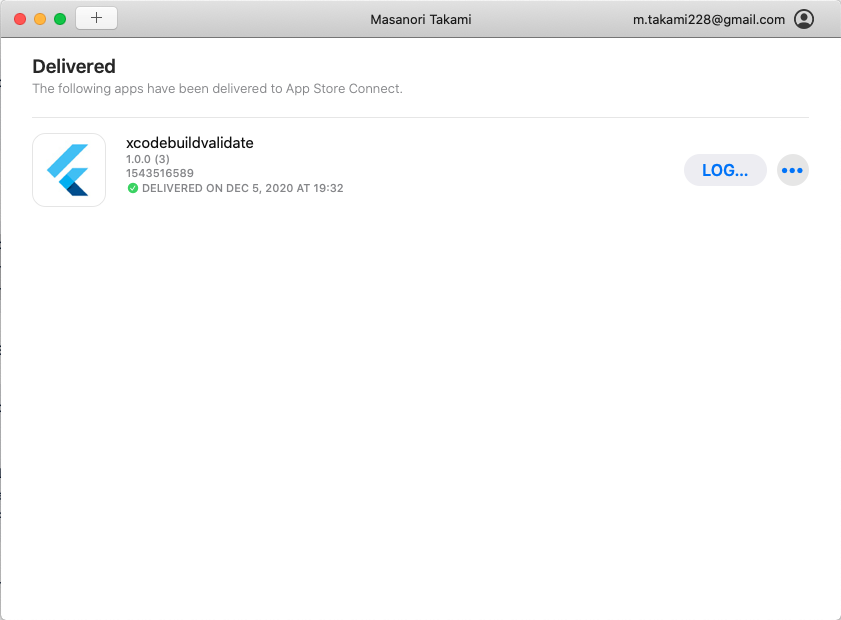
この状態で作成したipaファイルはApp Store Connectへのアップロードも成功しました!
このValifatedeは今回のようなバイナリ設定のエラーの他に、バージョン番号の間違いも検出できます。
$ xcodebuild -exportArchive -archivePath ../build/Runner.xcarchive \
       -exportOptionsPlist ExportOptionsProdValidate.plist
2020-12-05 17:02:54.174 xcodebuild[21868:6252939] [MT] IDEDistribution: -[IDEDistributionLogging _createLoggingBundleAtPath:]: Created bundle at path '/var/folders/6n/llxh8m296896rymtgjfbkmxw0000gn/T/Runner_2020-12-05_17-02-54.173.xcdistributionlogs'.
error: exportArchive: App Store Connect Operation Error. Redundant Binary Upload. You've already uploaded a build with build number '3' for version number '1.0.0'. Make sure you increment the build string before you upload your app to App Store Connect. Learn more in Xcode Help (http://help.apple.com/xcode/mac/current/#/devba7f53ad4).

Error Domain=ITunesConnectionOperationErrorDomain Code=1091 "error: App Store Connect Operation Error. Redundant Binary Upload. You've already uploaded a build with build number '1' for version number '1.0.0'. Make sure you increment the build string before you upload your app to App Store Connect. Learn more in Xcode Help (http://help.apple.com/xcode/mac/current/#/devba7f53ad4)." UserInfo={NSLocalizedDescription=error: App Store Connect Operation Error. Redundant Binary Upload. You've already uploaded a build with build number '1' for version number '1.0.0'. Make sure you increment the build string before you upload your app to App Store Connect. Learn more in Xcode Help (http://help.apple.com/xcode/mac/current/#/devba7f53ad4).}

** EXPORT FAILED **
なお今回のエラーの発生条件は1.17.5から1.22.0へのバージョンアップです。1.22.0の状態でプロジェクトを新規に作成すると、AppFramework.plistのMinimumOSVersionの値は9.0となっており元のエラーは発生しませんでした。
また最新の1.22.4では関連するエラーに関するパッチがあたっており、1.17.5から1.22.4へのバージョンアップでは上記のエラーは発生しないようになっていました。
該当のPRは以下になるようです。
また、Flutterのドキュメント側にも修正がはいったようで、Deployment Targetを修正する場合はAppFramework.plistのMinimumOSVersionの値と揃えるようにするように追記されました。
Build and release an iOS app - Flutter
validate処理を加えたFlutterアプリのipa作成スクリプト
以前作成したFlutterでipaファイルを作成するスクリプトにvalidate処理を足すと以下のようになります。
#!/bin/sh
set -x
set -e

# Artifacts Path
OUTPUT_APK_PATH="./artifacts/ios"

# TARGET_APP_VERSION
TARGET_APP_VERSION=${1}

# TARGET_BUILD_NO
TARGET_BUILD_NO=${2}

# cleanを実行
flutter clean

# 依存関係を解決
flutter pub get

# flutter buildを実行
flutter build ios --release \
  --build-name=${TARGET_APP_VERSION} --build-number=${TARGET_BUILD_NO}

cd ios

# archive を作成
xcodebuild -workspace Runner.xcworkspace -scheme Runner -sdk iphoneos \
  -configuration Release archive -archivePath ../build/Runner.xcarchive

# 作成するipaファイルをvalidateする
xcodebuild -exportArchive -archivePath ../build/Runner.xcarchive \
       -exportOptionsPlist ExportOptionsProdValidate.plist

# ipa fileを作成
xcodebuild -allowProvisioningUpdates -exportArchive \
  -archivePath ../build/Runner.xcarchive \
  -exportOptionsPlist ExportOptionsProd.plist -exportPath ../build/ios-release

# 成果物をコピー
cp ./build/ios-release/Runner.ipa ${OUTPUT_APK_PATH}/app-release-${TARGET_APP_VERSION}.${TARGET_BUILD_NO}.ipa
まとめ
CDパイプラインの中での利用を想定してxcodebuildコマンド経由でValidate Appする方法をFlutter製のアプリを例にまとめました。
XcodeでApp Store Connectへのアップロードを実行しているプロジェクトではあまり恩恵はないですが、ipaの作成とApp Store Connectへのアップロードの運用が別れているようなプロジェクトでは資材を引き渡した後のアップロードエラーの手戻りを未然に防げるのではないでしょうか。
フレームワークのバージョンアップや開発ツールの更新を行った時は今まで動いていた仕組みが変わって思わぬところでエラーが発生するケースがあるため、それを事前に検知できるような仕組みづくりもトライアンドエラーにはなりますが、次は同じ轍を踏まないように毎回改善を繰り返しておくとよいでしょう。